Feature spotlight: integrating Xero with Beyond
by Mell Magment
![]()
Integrating your accounting system with a new Beyond account
If you haven’t signed up for a Beyond account yet, a) you really should, it’s pretty snazzy, and b) you can integrate your accounting system with Beyond as soon as you create your account, so your system is full of real, useful data right away.
After you’ve popped in your email address and crafted the perfect password (it’s more art than science, really), you’ll need to do three tasks to get Beyond up and running: set up your plans (which we can do for you – score!), link your accounts, and start inviting users.
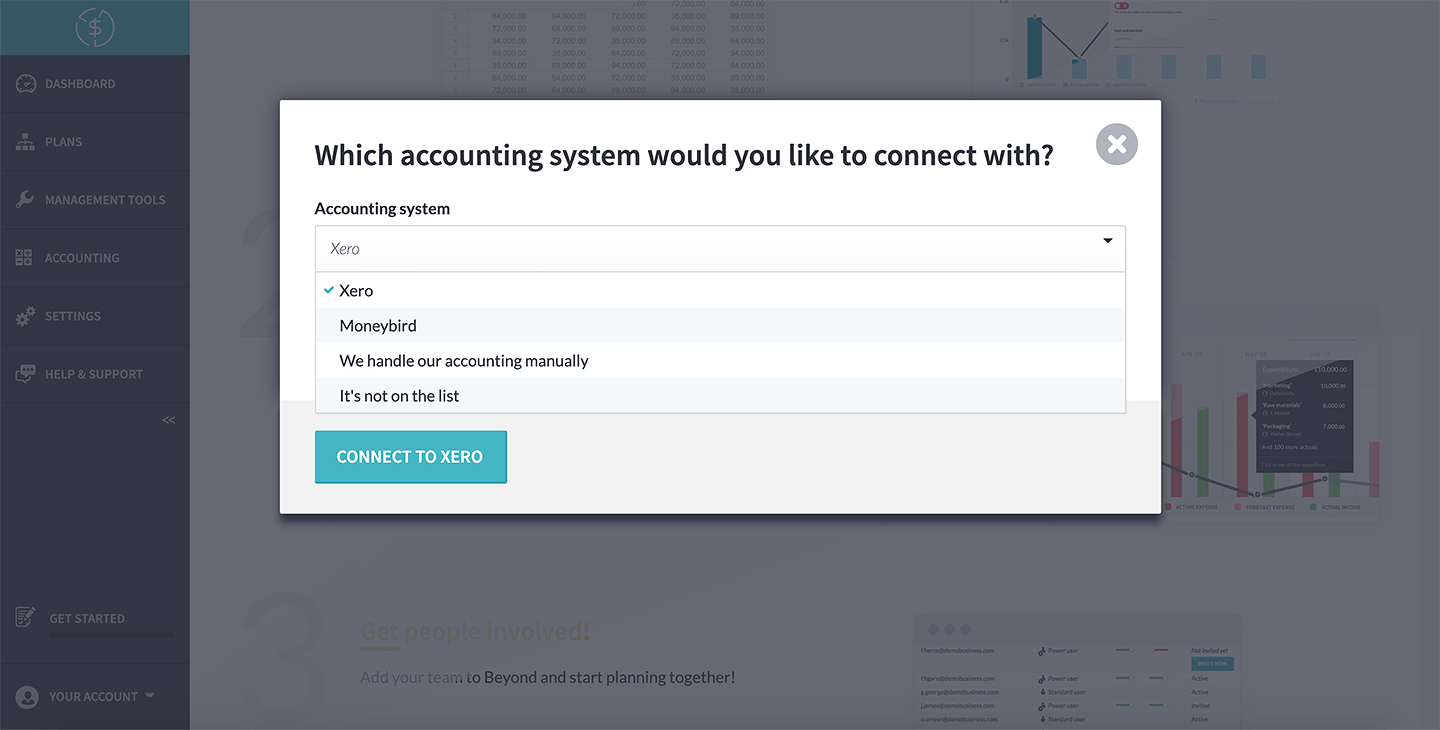
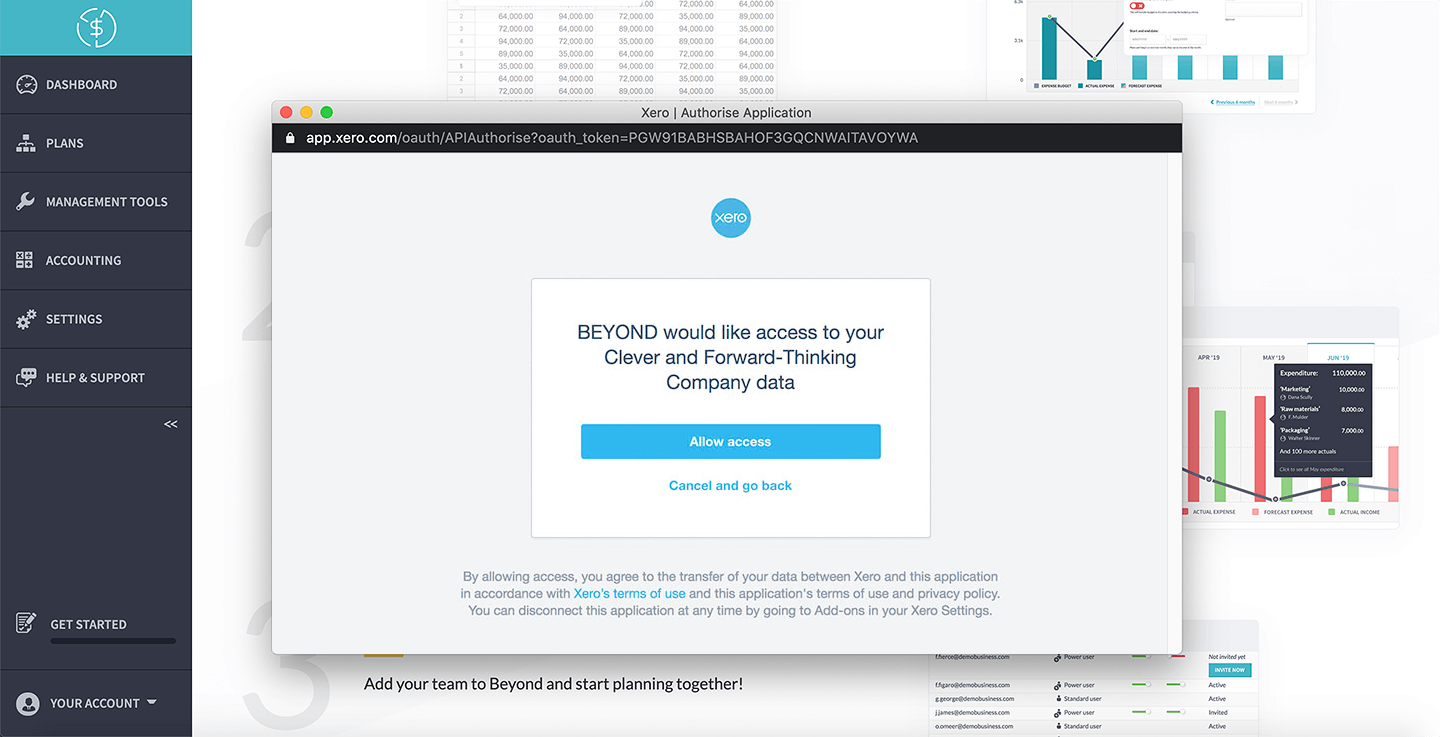
Linking your accounts is straightforward. Choose your accounting system – in this case, Xero – from the list and hit ‘connect and sync your data’. You’ll be asked to log into Xero and allow Beyond to access to your data. (This lets us import your actuals into Beyond, so you have your real, up-to-date finances alongside your plans; we can’t see your banking information or the pictures from that weekend.)
Next, you can choose how far back you want to synchronise your data; we’ll only bring in actuals from the date you give us, so your system isn’t bogged down with unhelpful receipts from 1997.
By default, we’ll sync with your revenue and expense accounts, but you can add more accounts any time from the Chart of Accounts page.
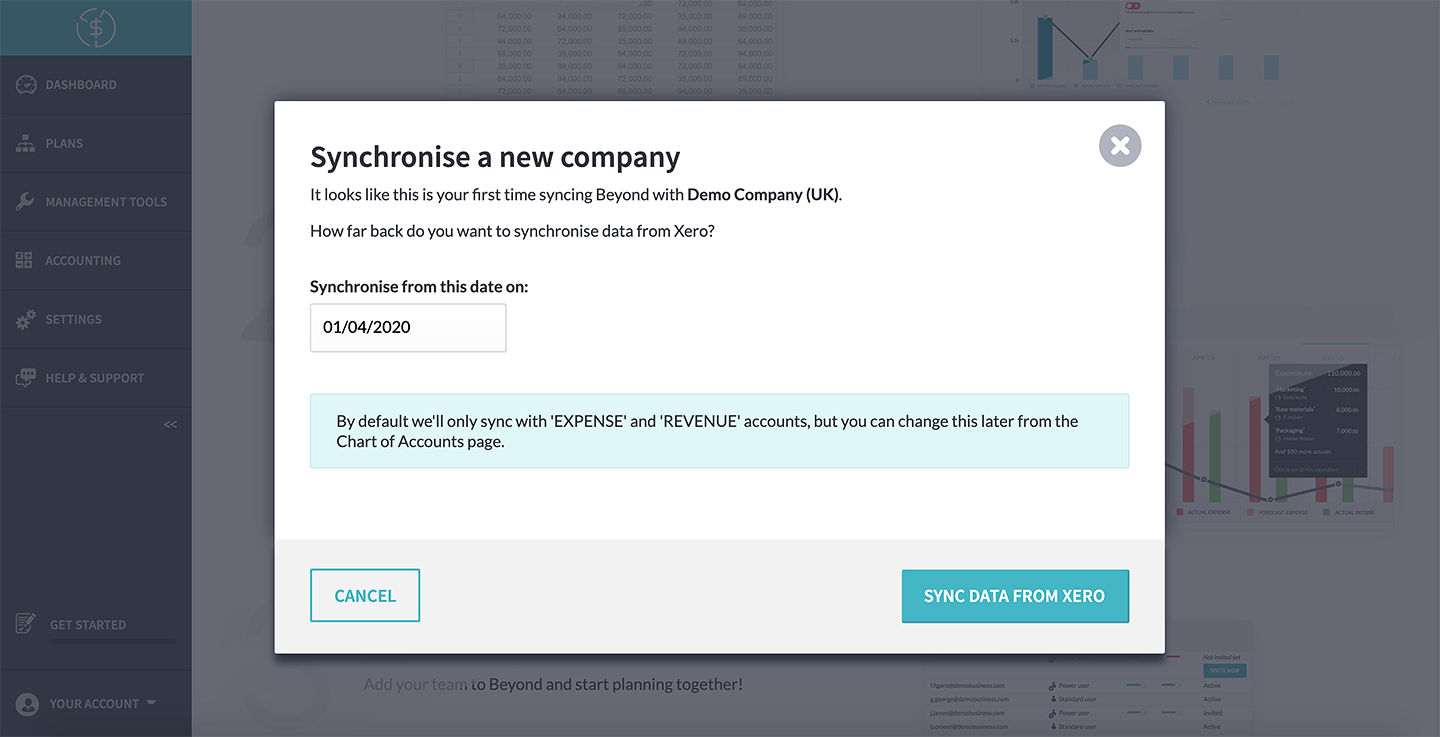
Hit the ‘sync data from Xero’ button and – boom! – you’ve integrated your Xero account with Beyond. It’s just that easy.
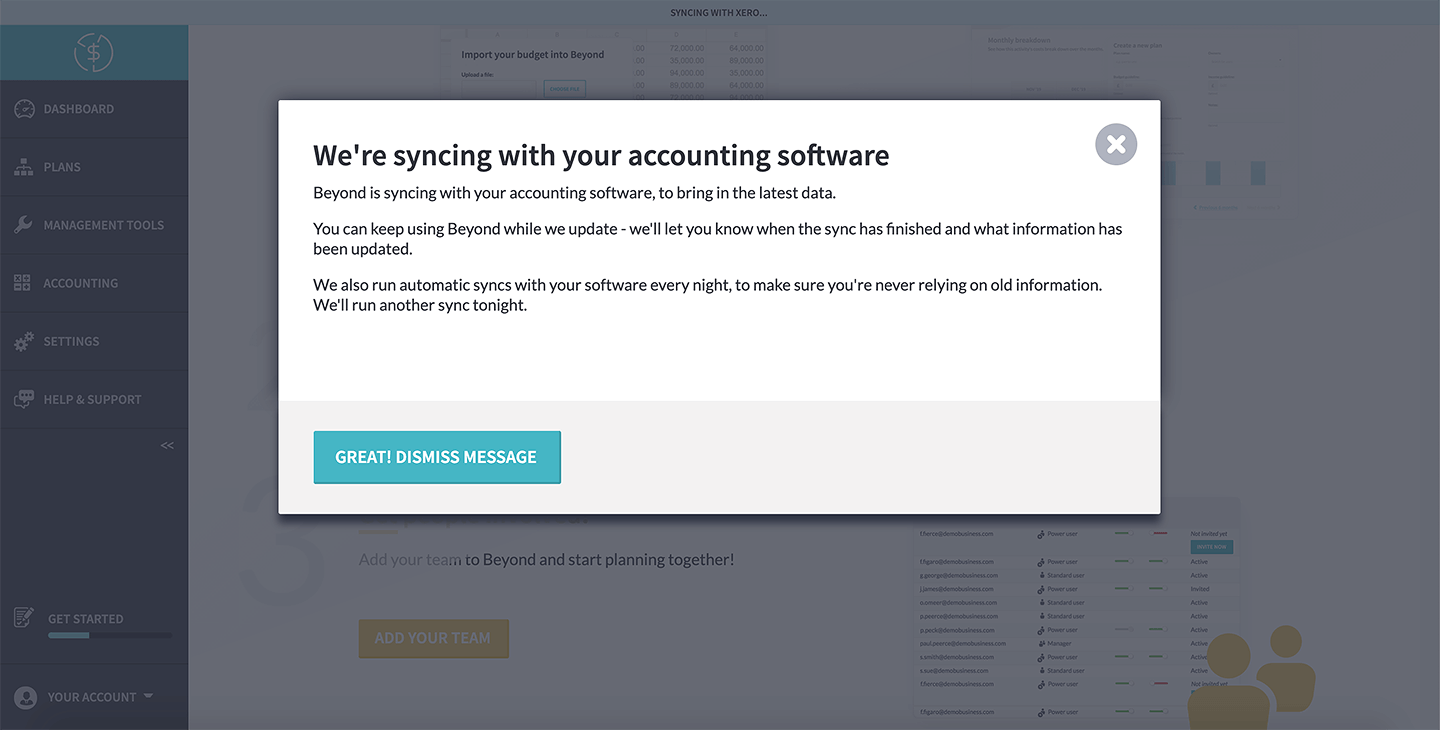
Beyond will work away in the background, bringing the data you asked for into your account, so – by the time you’ve finished the last step, adding other users – all of your data will be in Beyond, waiting for you, on the ‘actuals manager’ page of the ‘accounting’ section.